How To Setup Cloudflare CDN on WordPress Blog
You may have heard about Cloudflare that is Free CDN for WordPress allow you to add an additional layer of security on your WordPress blog. If you are thinking to improve your blog’s loading time, CDN (Content Delivery Network) allows you to load your blog faster content delivery to your readers for better user experience. Using Cache plugins, optimized image delivery and using the content delivery network to serve content provides best results to improve page speed and performance. Google is also considering page loading speed in ranking, so if your blog is loading faster, your blog’s ranking can be improved too.
Why Should You Use Cloudflare
CloudFlare is basically a FREE CDN (Content Delivery Network) caches web pages from your website and its system is distributed in multiple data center across the internet. All webpage access request by the user is served by a CDN server that is the nearby location to the end user. It helps webpage loading faster by minifying Javascript and adds an additional layer of security by challenging attackers and spambots.It filters unwanted traffics and protect your blog against DDoS attacks.
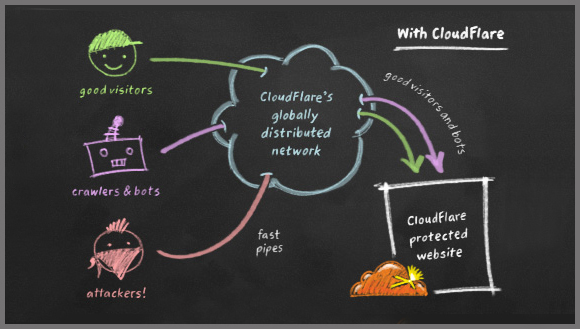
What CloudFlare Does is protect your blog from attackers, crawlers, and bots and filter them so only good visitors and bots come to your website.Suppose your seomediaworld.com’s IP address is 2.2.2.2, so whenever you type seomediaworld.com in the browser and hit enter, it will look for 2.2.2.2 IP from the web and serve you the content available on that DNS. Now if your domain name server is nacked, they are without protection and it can be easily accessed by hackers or attackers.
When you configure CloudFlare, you will need to change your default domain name server associated with your domain. Generally, you are pointing IP address or domain name of your web hosting account from your domain name provider’s account. But for setting up Cloudflare, you will need to setup Cloudflare’s name server on your domain provider’s account.
There are two methods to setup CloudFlare free CDN
- Automatic Setup from Hosting Account cPanel
- Manual Setup to configure Cloudflare CDN
How to Setup Cloudflare CDN from cPanel Automatically
Generally, Bluehost or Hostgator allow users to directly setup Cloudflare CDN from their cPanel. I generally prefer to set up an account with Bluehost, hence we would be discussing on configuring Cloudflare CDN on Bluehost cPanel.
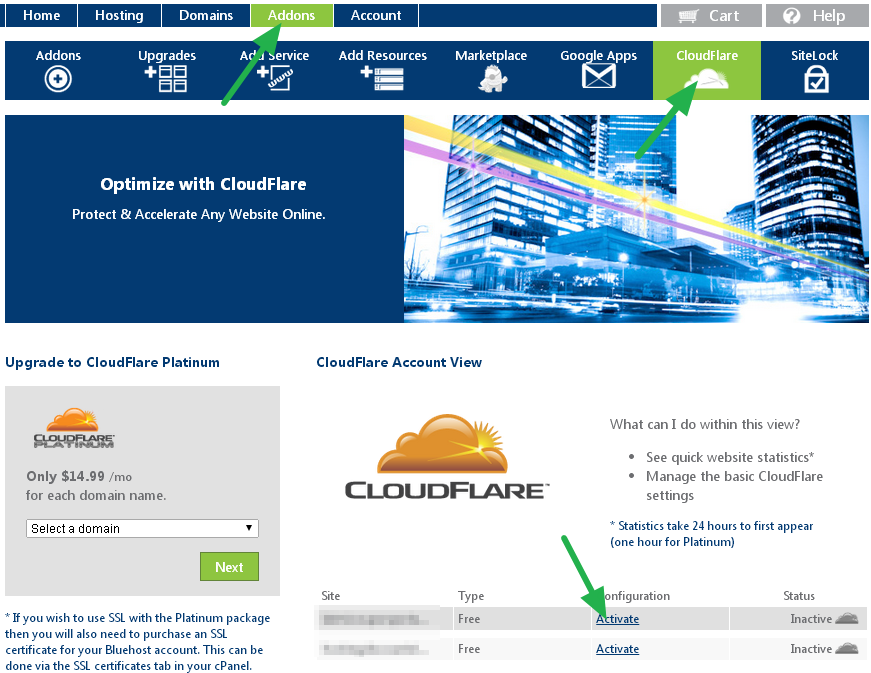
Login to your Bluehost account > Add-ons > Cloudflare. There you will find Cloudflare account view option and there you will find activate the option. Click on the domain on which you want to configure Cloudflare and on status click on inactive to activate your Cloudflare CDN.
Manually Configure Cloudflare CDN
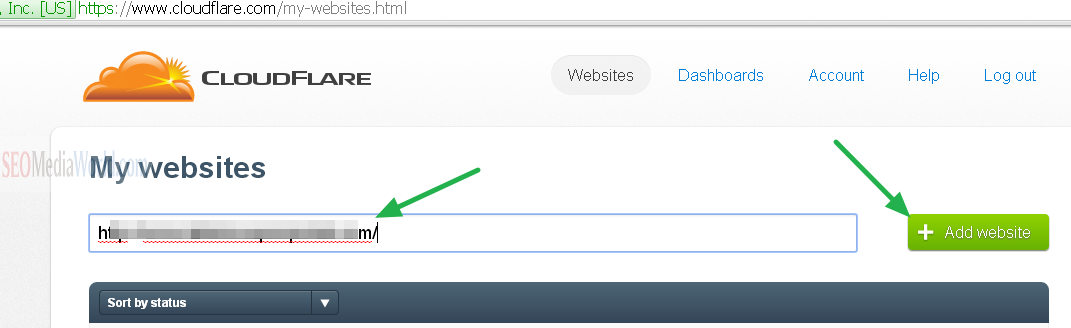
- If you don’t have Cloudflare account, you can create new Cloudflare account from the official website.
- Now you will see Cloudflare account configuration option to add URL of your website.Enter URL of your blog and click on add website button.
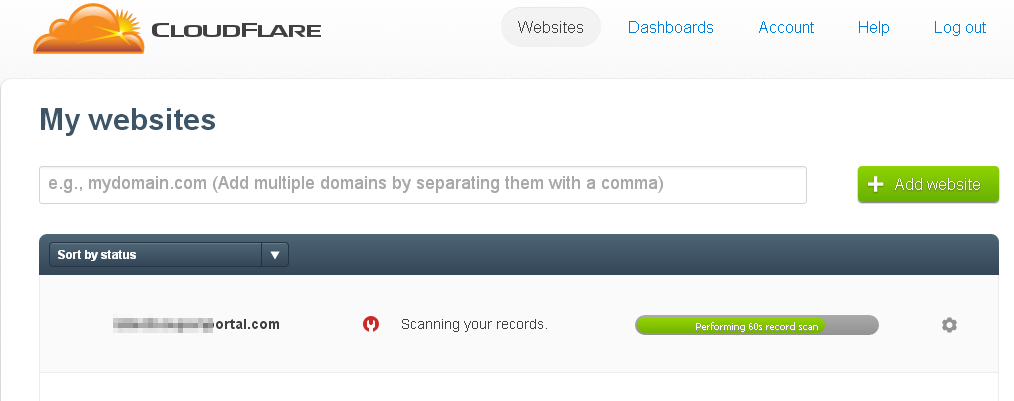
- Now it will initially scan your records and then proceed further. You will need to wait until records get scanned and then click on continue setup option to proceed further.
- Now you will see Configure your DNS records option.
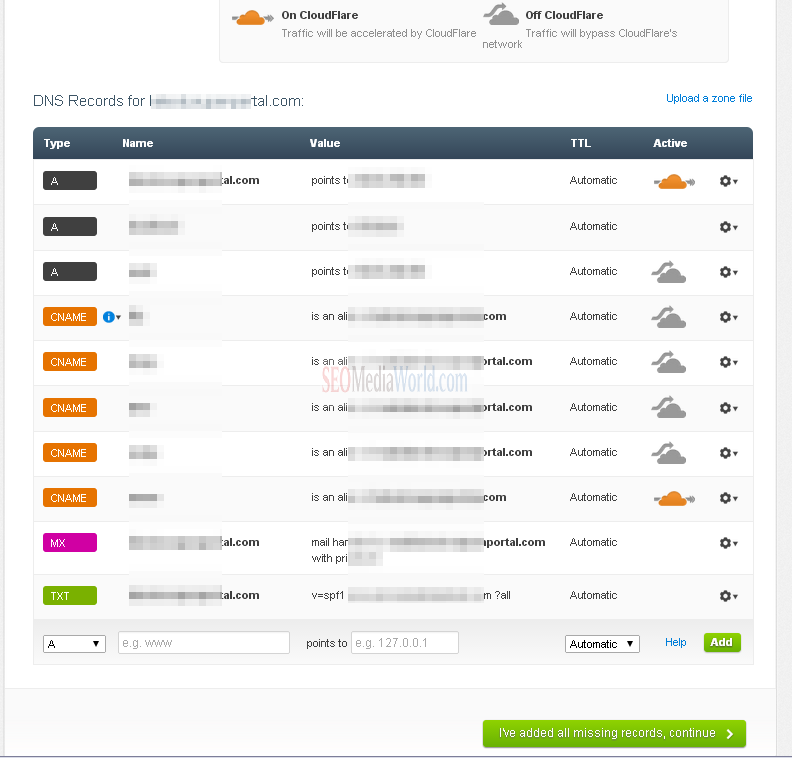
- Click on I have added all missing records, continue option to proceed further. If cloud icon is yellow colored, your traffic will be accelerated by Cloudflare and if the cloud is a gray color icon, traffic will bypass Cloudflare networks as shown in Configure your DNS records option.
- Now you will need to configure Cloudflare from your account, Choose a plan for you, if you wish FREE account, you can choose $0/month option, if you want to go for additional features, you can go for the paid version.
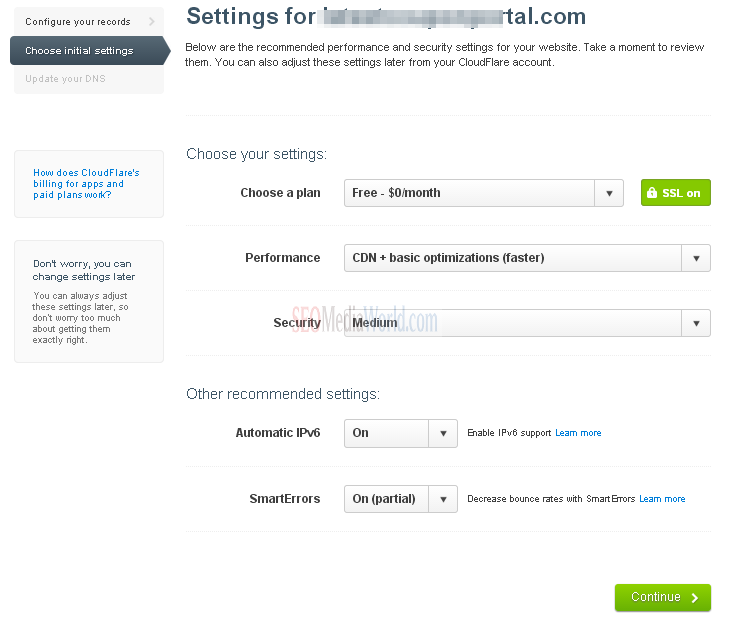
- Select performance option as CDN + Basic optimization(faster) on security that will be for your caching performance, select medium that is optimum for preventing spam-bots attacks on your blog. Alternatively, you may also select higher security level if your website is under attack. It is not recommended in any case because it may cause inconvenience to genuine visitors also.On other recommended setting, leave it as it is. Click on continue to proceed to next step.
- Next step is to update DNS from DNS provider. For that, you will need to login to your domain provider’s account and update nameservers which is actually pointing to your server right now.
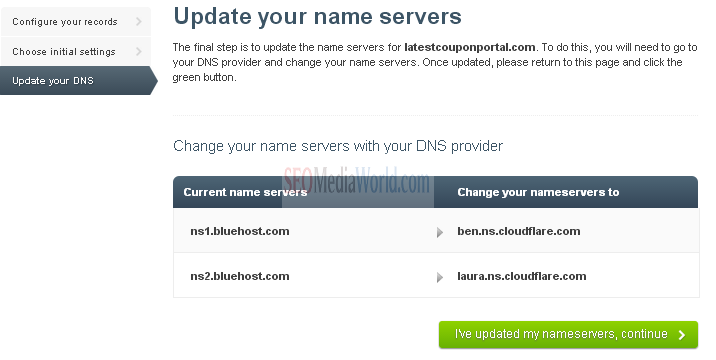
You will need to login to your Domain name registrar’s account to change your name servers. Once you successfully update your name servers to Cloudflare account’s Nameserver, click on I’have updated my nameservers, continue button.It will show you success message once you configure and update your DNS. 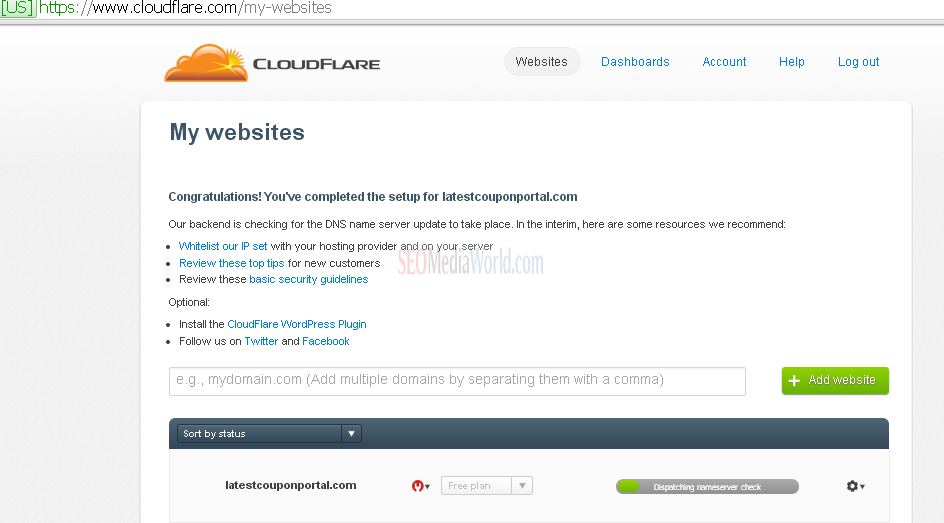
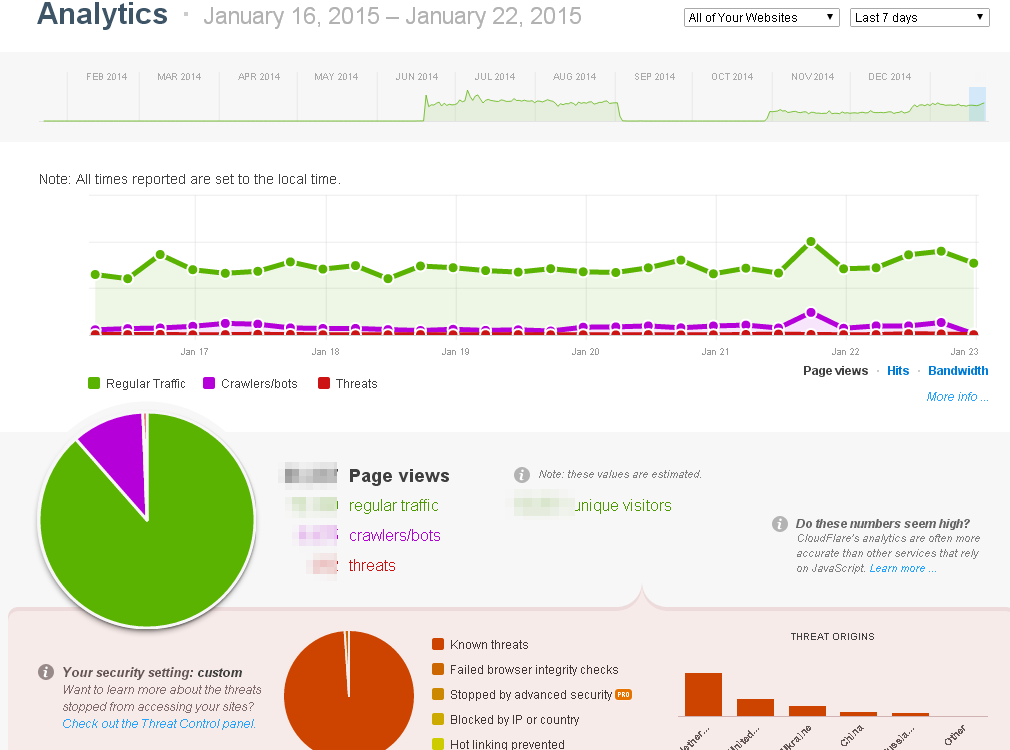
You will be able to access your Cloudflare apps, analytics and threat control on my websites section of your Cloudflare account.
Cloudflare Features
Cloudflare apps provide additional features to users like Google analytics, Google webmaster tools, ScrapeShield provides security against content scrappers etc.
Cloudflare Analytics allow you to monitor your traffic that shows information about your blog’s page views, crawled pages, amount of bandwidth saved by using Cloudflare and many other features.
Cloudflare Threat control option allows you to block or white-list any IP that you seem suspect. You can block traffic from a specific country or custom IP range if you wish, you can configure it from threat control option.
Rocket Loader – Allow the user to increase page speed and loads all JavaScript code Asynchronously to improve page loading performance.
Download Cloudflare WordPress Plugin
You can download Cloudflare Free CDN for WordPress plugin that helps you to configure your WordPress blog with Cloudflare easily. An interesting feature of this WordPress plugin is that it shows Correct IP Address information for comments posted to your site. Also provide better security because whenever you mark any comment as spam, it will report to cloudflare. Likewise all bloggers who mark comment as spam, they are reported to Cloudflare and it ensure better protection against spammers.
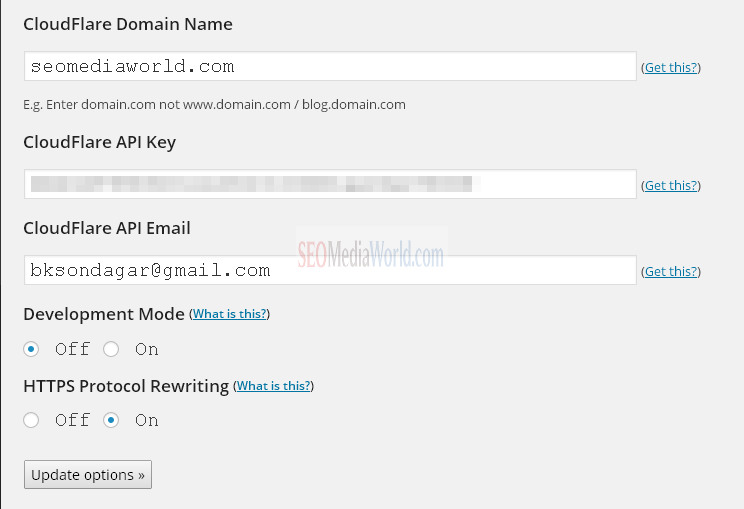
You can configure Cloudflare WordPress plugin from WordPress dashboard > Setting > Cloudflare option. You will have to enter your domain name, API key you can get from your Cloudflare account and your registered email address with Cloudflare. You can also refer to video on how to setup Cloudflare on WordPress in just 5 minutes.
Conclusion
Cloudflare is FREE CDN provide better security and I almost use it on all of my blogs. It helps a user to provide better security against brute force attack. If you are not using Cloudflare for your blog, you should use it. If you need any help in setting up Cloudflare account with your blog, you may feel free to ask my FREE help. I would love to help you. If you are using it, you can share your experience with Cloudflare in the comment section below. It would help our readers to know more about their service from your valuable comments.
Hi Bhavesh,
Nice share. This is really a simple yet useful tutorial to setup cloudflare cdn for wordpress blog..
Thanks Bhavesh for sharing this cool tutorial.